Thursday, September 4, 2014

Particle Strain: Another Family Project

We had so much fun with our first family project that we decided to do one more before the end of the summer.  The kids -- if I may use that term to describe two awesome young men in high school -- decided it would be fun to do a software project as a family; a game, to be exact.

It's been a long time since mom and dad have worked on a game, so it sounded like fun to us. We did add one stipulation, however: it would have to be done in two weeks and at the end of those two weeks we had to have a complete, finished game that could be accepted into the various app stores.

The kids' response?  Challenge accepted.

Particle Strain title screen.
Two weeks to make a technology decision, design and program a game (along with all of the various art and sound assets) made for an interesting constraint. We were also constrained by the fact that we're programmers first and foremost, with not a lot of artistic or musical ability among us.  This definitely shaped the type of game we could make.

Me not doing so well at the whole "make patterns" thing.
We eventually settled on a action/puzzle game where the player flies through wormholes collecting particles to make patterns on the screen.  Pretty much everything in the game such as levels, textures, and effects are procedurally generated.  We ultimately decided on Unity3D as a technology framework, mainly for its built-in asset pipeline and its ability to target a variety of mobile platforms.  This also gave us the chance to shake the rust off of our C# skills.

And don't forget about all those little things like app stores, code signing, and even a little website to go along with it.  All in all we had a really great time doing this project.  We even met our programming deadline with 20 minutes to spare, getting the last bug fix in at 11:40 PM on the last day.

As of yesterday, Apple finally approved Particle Strain for the iTunes store.  It is now available as a free download in all of the usual places: iTunes, Google Play, and Amazon.  There is a big difference between writing code and developing a complete, finished product.  I'm glad we were able to help the kids experience it, even if in a small way.

If you end up trying out Particle Strain, we hope you enjoy our little game.  I, for one, can't wait to figure out what our next project will be!

Monday, June 16, 2014

Identifying Balloons Using Computer Vision

Note: This is a series of articles in which we document our attempt to build an autonomous drone for the Sparkfun AVC.  The previous post is here.

This is a followup to my previous article describing how to compile a hardware accelerated version of OpenCV.  You can find that article here, but to briefly recap: part of the Sparkfun AVC is finding and popping red balloons. We wanted to do this using on-board vision processing. For performance reasons we need to hardware accelerate the vision system. We are using the Jetson TK1 board from NVIDIA with the OpenCV library.

What follows is a description of the vision system we developed. The full code for the vision system can be found on github at https://github.com/aiverson/BitwiseAVCBalloons

The OpenCV Project

The Open Computer Vision project (OpenCV) is easy to use and allows you to quickly program solutions to a wide variety of computer vision problems. Normally, the structure of a simple computer vision program using OpenCV is:

  1. read in a frame from a video camera or a video file
  2. use image transformations to maximize the visibility of the target
  3. extract target geometry
  4. filter and output information about the target.

For hardware accelerated applications, OpenCV provides hardware accelerated replacements for most of its regular functions.  These functions are located in the gpu namespace which is documented at http://docs.opencv.org/modules/gpu/doc/gpu.html

The Algorithm

When trying to identify our balloon targets, the first thing I tried was converting the video stream to Grayscale because it is fast and cheap. However, this did not give sufficient distinction between the sky and balloons. I then tried converting the stream to HSV (Hue Saturation Value) because it is good for identifying objects of a particular color and relatively simple to do. The balloons are quite distinct in both the hue and saturation channels, but neither alone is sufficient to clearly distinguish the balloons against both the sky and the trees. To resolve this, I multiplied the two channels together, which yielded good contrast with the background.

Here is the code implementing that section of the algorithm.

gpu::absdiff(hue, Scalar(90), huered);
gpu::divide(huered, Scalar(4), scalehuered);
gpu::divide(sat, Scalar(16), scalesat);
gpu::multiply(scalehuered, scalesat, balloonyness);
gpu::threshold(balloonyness, thresh, 200, 255, THRESH_BINARY);

Hue is normally defined with a range of 0..360 (corresponding to a color wheel) but to fit into eight bits, it is rescaled to a range of 0..180. Red corresponds to both edges of the range, so taking the absolute value of the difference between the hue (with a range of 0..180) and 90 gives how close the hue is to red (huered) with a range of 0..90. The redness and saturation are both divided by constants chosen to give them appropriate weightings and so that their product fits the range of the destination. That result, which I call balloonyness (i.e. how much any given pixel looks like the color of the target balloon) is then taken through a binary threshold such that any pixel value above 200 is mapped to 255 and anything else is mapped to zero, storing the resulting binary image in the thresh variable. The threshold function is documented at http://docs.opencv.org/modules/imgproc/doc/miscellaneous_transformations.html#threshold, the GPU version is equivalent.

Once the image has been thresholded, I extract external contours. The external contours correspond to the outlines of the balloons. The balloons are nearly circular, so I find the minimal enclosing circle around the contours. Then, to deal with noise (red things that aren't shaped like balloons), I compare the area of the circle with the area of the contour it encloses to see how circular the contour is.

The image below illustrates this process.
I could also have used an edge detector and then a Hough circle transform (http://en.wikipedia.org/wiki/Hough_transform) to detect the balloons, but I decided not to because that method would not be able to detect balloons reliably at long range.

The Joys of Hardware Acceleration

Before hardware acceleration, this algorithm was running at between two and three frames per second on the Jetson board. With hardware acceleration, it now runs at over ten frames per second, and it is now limited by how quickly frames from the camera can be captured and decoded. This equates to about a five times speedup overall. It is even greater if you only consider the image processing phase.

Writing computer vision systems seems very intimidating at first, however there is very good library support so many types of problems can be solved easily with only a little research and experimentation.

Sunday, June 15, 2014

Hardware Accelerated OpenCV Configuration

Note: This is a series of articles in which we document our attempt to build an autonomous drone for the Sparkfun AVC.  The previous post is here.

Part of the Sparkfun AVC is finding and popping red balloons. We wanted to do this using on board vision processing. For performance reasons we need to hardware accelerate the vision system. We are using the Jetson TK1 board from NVIDIA with the OpenCV library. Here are instructions for configuring OpenCV with CUDA hardware acceleration on the Jetson TK1.

Imaging the Jetson Board

The first step is to image the Jetson TK1 with the latest version of Linux 4 Tegra (L4T); at the time of writing this is Rel-19 which is available at https://developer.nvidia.com/linux-tegra-rel-19. There are good instructions for this available from NVIDIA in the quick start guide available on the L4T page.

I did "sudo ./flash.sh -S 8GiB jetson-tk1 mmcblk0p1"

Installing Cuda

You must be part of the CUDA/GPU Computing Registered Developer program to get CUDA. Signing up is free on the NVIDIA developer website. You will have to login or create an account.

Download the CUDA Toolkit; at the time of writing this is CUDA 6.0 Toolkit for L4T Rel-19.2 which is available from developer.nvidia.com/jetson-tk1-support. That page also contains a getting started with linux guide which has more instructions; I only give the minimum required for this specific case. For troubleshooting refer to the getting started with linux guide.

Install the CUDA Toolkit:
cd Downloads/
sudo dpkg -i cuda-repo-l4t-r19.2_6.0-42_armhf.deb
sudo apt-get update
sudo apt-get install cuda-toolkit-6-0

Create symbolic links for the CUDA Libraries for compatibility. I put them in /usr/local/lib:
cd /usr/local/cuda-6.0
sudo ln -s *.so /usr/local/lib

Ensure that your PATH contains the CUDA executables:
export PATH=/usr/local/cuda-6.0/bin:$PATH

Ensure that your LD_LIBRARY_PATH includes the CUDA libraries and custom built libraries:
export LD_LIBRARY_PATH=/usr/local/lib:/usr/local/cuda-6.0/lib:$LD_LIBRARY_PATH

Compiling OpenCV

Download and extract the OpenCV code. I am using version 2.4.9 because, at the time of writing, that is the latest version.

Create a build directory in the same directory as the source directory. I put the source code in my Downloads directory, which currently contains "cuda-repo-l4t-r19.2_6.0-42_armhf.deb", "opencv-2.4.9.zip", "opencv-2.4.9", "opencv-2.4.9-build".

The GUI functions in OpenCV depend on GTK, so if you plan to use them, install libgtk2.0-dev:
sudo apt-get install libgtk2.0-dev

You need CMake to configure OpenCV so install that:
sudo apt-get install cmake

Change into the build directory for OpenCV

Configure OpenCV with the appropriate CUDA_ARCH_BIN for your GPU's Compute Capability, which can be determined with the deviceQuery CUDA sample. For the Jetson TK1, this is 32, so I ran:
cmake  -DCUDA_ARCH_BIN=32 ../opencv-2.4.9

Run the compile and install using make; The command I used was:
sudo make -j4 install

The -j4 flag instructs it to run four jobs simultaneously, which gives a considerable speed-up when run on the Jetson which has four large ARM Cores, but allows some of the output to be out of order or interleaved.

Using GPU accelerated OpenCV

The GPU module for OpenCV is quite simple to use. The functions in the gpu namespace generally have identical semantics to the cpu variants, with the only difference being that they take cv::gpu::GpuMat arguments instead of cv::Mat arguments. Data must be uploaded and downloaded between the CPU and GPU in order to be used. GpuMat provides upload and download functions that take a single Mat as an argument to transfer the data between the CPU and GPU.

For example, the code below shows the difference between using the CPU and the GPU for the threshold function.

using namespace cv;

Mat src_host, dest_host;

//on the CPU
threshold(src_host, dest_host, THRESH_VAL);

//on the GPU
gpu::GpuMat src, dest;
src.upload(src_host);
gpu::threshold(src, dest, THRESH_VAL);
dest.download(dest_host); 

My next article will discuss the specific algorithm we are using to find balloons.

Sunday, June 1, 2014

GroovyFX 0.4.0 Released

GroovyFX makes writing JavaFX code fast and easy.  The latest version is available from Maven Central using the coordinates

org.codehaus.groovyfx:groovyfx:0.4.0

This new version includes support for Groovy 2.3.x as well as Java 8 and JavaFX 8.  Please try it out and let us know if you have any problems by sending email to the mailing lists.

If you are a current user of GroovyFX and have any thoughts or questions on future directions, please send those to the mailing lists as well!

Friday, May 30, 2014

Day Four: Bomb's Away!

Note: This is a series of articles in which we document our attempt to build an autonomous drone for the Sparkfun AVC.  The previous post is here.

Day four was our final day of prototyping so we really wanted to get the ball drop working. We felt that being able to launch, fly a significant distance, drop the ball on a target, and return to a safe landing would give us a minimally viable entry for the Sparkfun AVC.

Having had no success with the passive drop on day three, today was all about programming the Pixhawk to activate a servo motor to initiate the drop.  We constructed a simple prototype using some of the parts we had previously printed and then figured out how to wire it into the Pixhawk.  It took some time to learn the idiosyncrasies of Pixhawk programming and get it to send the correct servo command at the right time.  Perseverance was the word of the day, and it paid off in the end.

You can see the culmination of our four days of prototyping in the summary video, and then read on for all of the (hopefully) interesting details.


You Got Servo-ed

After constructing a quick and simple prototype of the drop mechanism, we attached it to the quad-copter using duct tape, that time-honored prototyping tool.


One of the major pain points of the day was finding good documentation for our specific situation.  It's very possible that we just never happened to find the correct, up-to-date docs, but this was a major source of confusion.

The Pixhawk has 8 ports labeled MAIN OUT and 6 additional ports labeled AUX OUT.  Based on the best information we could find, our initial guess was that the AUX ports should be used for controlling servos, and that we should pass a servo number of 1 to the DO_SET_SERVO command if we wanted to use AUX port 1.  The command's position parameter was another uncertainty.  We read that typical position parameter values ranged from 1000 to 2000, so we began with values in that range hoping to just see any movement that would confirm that we were on the right track.  When we tried to run the program, the servo just sat there silently mocking us.  At this point, the list of potential problems was long: 
  • Was the servo connected properly?  
  • Which port should we use?
  • Did we use the right servo number in the command? 
  • Were we sending it valid position values?
  • Is our DO_SET_SERVO command even executing?
  • Did we need to initialize the port or set other initialization parameters?
What were we doing wrong?  Well, as it turns out, all of the above.  Let's take them one at a time and we'll share our discoveries and solutions along the way.

Was the servo connected properly?  
It was time to go down to the hardware level and eliminate some of our unknowns.  We started probing the Pixhawk's output ports with a volt meter and an oscilloscope.


We discovered some things that surprised us.  The Pixhawk does not supply power to any of the power pins on its bank of PWM output ports.  The only port that has a working 5V power pin is the RC IN port, which is used to talk to the receiver.  We couldn't see an obvious place to get 5V power from the Pixhawk itself, so as a work-around we used one of the PWM outputs of the receiver module, which was powered by the Pixhawk's RC IN port.  This is a bit of a hack, but it worked.

Which port should we use?  Did we use the right servo number in the command?
We discovered that there is a servo test interface in the Mission Planner app.  The docs say that it doesn't actually work, but some reports from the internet indicate that it does.  When we initially used this interface to test our servo, it would never move, but we couldn't be sure if it was a working test.  

After figuring out the servo connection as described above, we were able to confirm that the servo test interface in Mission Planner does indeed work!  We were able to see output on MAIN port 8 when toggling the output of servo 8 on the UI.  Some quick probing verified that servo numbers 5 - 8 correspond to ports 5 - 8 on the Pixhawk's MAIN OUT ports.  The AUX OUT ports 1 - 3 map to servo numbers 9 - 11 on the test interface.  Presumably, AUX OUT 4 - 6 map to servo numbers 12 - 14, but the UI didn't allow us to test that.  We chose to use MAIN OUT port 8 for our servo, so as to avoid ports 1 through 6 since they will be used by the motors on our hex-copter.

Were we sending the servo valid position values?
Using the servo test UI, we could now determine that the proper position values for our mechanism were 100 and 1900 for the open and close position.  This was an exciting moment - the servo was finally moving.  It was a big step for us even though it could only be controlled through the test UI.  We were finally confident that our servo should work if we could figure out how to execute the commands properly

Is our DO_SET_SERVO command even executing?
There are some gotchas in getting the DO_SET_SERVO command to execute properly.  First, you can't just run a mission to move a servo.  The servo command needs to be sandwiched between two navigation commands.  But, not just any two navigation commands.  The navigation commands need to take long enough to execute that the servo has time to complete its movement. This means that the waypoints must be far enough apart that they will not trigger before the servo has the chance to open all the way. We ran into a few more gotchas before Matt figured out a workable solution of a nav command followed by a single servo command, followed by another nav command (not too close to the first one), followed by another single servo command, and one final nav command.  Trying a servo command followed by a condition delay didn't work.

We had hoped to test the servo with a tiny mission that we could execute indoors with the propellers removed from the quad-copter, but were unable to get that to work.  We are still looking for a good way to debug mission programming, so let us know if you know how to get feedback from Pixhawk that would let us know when our commands are being executed.

The end result was a mission that could reliably and accurately drop a tennis ball on target, but it was a bit of a struggle to get there.

Other Progress and the Future

Aside from helping us debug servos, Alex was also able to make some good progress on the vision front.  He installed a patch that allowed him to build a version of OpenCV that was able to properly enumerate menu items when using V4L2 (video for Linux 2).  The bottom line is that we are finally able to capture frames from the USB camera that is connected to the Jetson board.  That was a big step forward for our vision effort.  Now that we have frames to process, we can start writing code to identify our balloon targets.

This brings us to the end of an extremely fun week.  Matt and Alex are off to Las Vegas to compete with the Colorado ARML team (editor's note: Good luck, boys!) and so we are concluding this series of daily updates.  This week has given us a great start at building an entry for this year's AVC, but we certainly have a lot more to do.  We cannot yet find and pop balloons, but hopefully we'll be able to solve that problem in time for the competition on June 21st.  We will post future updates and videos as we go, albeit less frequently.  Thanks for reading!

Thursday, May 29, 2014

Day Three: Flipping Out

Note: This is a series of articles in which we document our attempt to build an autonomous drone for the Sparkfun AVC.  The previous post is here.

Any project in which a lot of learning takes place will inevitably experience setbacks.  But those kinds of projects are where the real fun happens, so days like this are a great experience for the aspiring engineers on the team.  If failures can teach you more than successes, then we surely learned a lot during day three.  After all the highs of day two, day three was packed with... challenges.

We experienced all kinds of problems from the small to the large, from 3D printer filament tangles to a major crash that has put our main copter out of commission.  Be sure to check out the video below, but I think what this means is that the easy part is over and now we're on to the real engineering portion of this project!


Ball Drop Brainstorming

We started the day by brainstorming ideas for tennis ball dropping.  The simplest thing that we thought might work was a passive drop where we put the ball in a container and attempt to tip or flip the copter to cause it to drop.  For testing this "passive" drop, we chose a tall cup to ensure the ball misses the propellers on the way out.  Unfortunately, we couldn't tip the copter enough to cause the ball to fall out.  Flipping the copter didn't do any better either since the copter accelerates through the whole flip and the ball stays pressed to the bottom of the cup.

On the bright side, we did get some practice at acrobatic flying, so that was fun.  We tried both manual and autonomous flips, which gave us the opportunity to learn how to trigger an autonomous flip command from our transmitter.

The other idea we pursued was an active drop using a servo motor to release the ball.  We modeled the parts in Creo for printing on the 3D printer and we created a quick Arduino-controlled test circuit to test the mechanism.  Thanks to filament tangles and other challenges, this part of the project got a little bogged down today.  The final parts didn't finish printing until about 2 AM, so we'll have to test the active drop tomorrow.

A Few Wins and a Big Loss

In a day filled with nagging little problems, we did manage to get a few other things accomplished.  Sondra and Matt did some more research on getting the autopilot to talk to the vision system.  Alex successfully re-flashed the Jetson board with the latest version of the OS.  The re-flashing process was giving us problems, so it was nice to finally get that to work.

The day's largest setback occurred during a nighttime test flight of yet another passive drop design.  The copter was handling a little strangely but we decided to go forward with the test anyway.  We lost control of the copter during a flip and it crashed from a height of about 30 feet straight into concrete.  The DJI air frame is tough, but it couldn't withstand that impact and we broke one of the motor arms and both the upper and lower boards.

Fortunately, we had initially ordered a F450 quadcopter for this project.  When we decided to try onboard vision processing with the Jetson board, the extra weight led to the switch to the larger F550 air frame.  Alex and Matt were able to quickly transfer all the components to the smaller quadcopter and we managed to get it flying before we called it a day.

I guess the good news is that we'll be able to use the quadcopter to continue prototyping our active ball drop mechanism while we wait for replacements for our damaged hexcopter parts.

Next: Day Four

Wednesday, May 28, 2014

Day Two. Objective: Autonomous Flight

Note: This is a series of articles in which we document our attempt to build an autonomous drone for the Sparkfun AVC.  The previous post is here.

Day two was an insanely fun day.  We all agree that this project is even more fun than we thought it would be.  We logged a lot of time flying and crashing the hexcopter today.  Side note: I am, hands down, the worst pilot in the family.  You won't see me at the controls on competition day.

I will say that the DJI F550 is one tough little copter.  We've abused it pretty thoroughly and the only damage it's taken is some scrapes and chips on the propellers.  There are a couple of new propeller sets on order.

Spinning Out of Control

As we left off from the previous night, we had a copter that would just spin around every time we took off.  Our first guess was that it was a transmitter calibration problem, but that checked out fine.  Is it possible that there is a trim setting in the autopilot that was off?  Our research turned up nothing.  Alex finally figured out that our motors were rotating backwards from what the autopilot expected.  The diagram below shows the correct configuration, we had fixed the motor numbers but had not noticed that each pair was rotating exactly backwards from what the Pixhawk expected.  Another silly mistake, but we're learning!


After rewiring our motors - yet again! - controlled flight was finally achieved.  This was an exciting milestone and we all took turns flying our new creation.


After a few very small, very controlled flights around our living room, we took it out to the back yard so we could get some elevation.  This allowed the younger, more dextrous members of the team to get some real flight time in.  I guess we can no longer claim that all that video game playing is a complete waste of time.  If you've never flown a quadcopter, I highly, highly recommend it.  So much fun.

We then spent some time testing out the stabilize, loiter, and land modes that we bound to a switch on our transmitter.  Stabilize mode attempts to keep the copter level but otherwise gives you complete control.  Loiter mode attempts to maintain the copter's current altitude and position.  It turns out that you can still control the copter and move it around in this mode, but it's quite a bit less sensitive to control input from the joysticks.  This mode was the easiest for me to fly.  Land mode, as you'd expect, just executes a soft landing and it does a remarkably good job.  The altitude sensor seems very accurate, which will make maneuvering around the obstacles on the AVC course a bit easier.

On to Autonomous

The next step was to add our GPS unit to the copter and connect it to the autopilot.  We really need to mount it on a platform above the electronics, but for this prototype we just zip-tied it to the quad base.  This may have hampered our accuracy somewhat and probably led to a crash that you'll see in the video below.

We elected to recalibrate our compass since the GPS receiver has its own, although this may have not been necessary.  Matt then initialized the flight planning software by setting the home location, adjusting the altitude down to a safe testing height (no higher than our backyard fence) and creating a flight plan.  He also replaced loiter mode with autonomous mode on our transmitter switch so we could take the copter in and out of autonomous mode with the flip of a switch in case of emergency.

Matt's first flight plan was to manually takeoff, engage auto mode, go to a waypoint and loiter, and then re-engage manual flight and land.  As mentioned previously, it turned out that our GPS receiver really isn't accurate enough to reliably navigate a space as small as our back yard.  It may be a problem with our compass, the magnetic declination settings, or maybe we're getting some interference with our GPS receiver.  Classifying this problem is on our task list for future investigation.

Eventually we worked around the accuracy issue and progressed to a flight plan with full autonomous take off, proceeding through two waypoints in our backyard, and a fully autonomous landing.  Check out this video for the day's highlights!


Tomorrow's objective will be to fly to a waypoint and drop a tennis ball from the hexcopter and return to the start point for landing - our first real mission simulation for the AVC! Check back tomorrow to see how we do.

Next: Day Three

Day One. Objective: Achieve Manual Flight

Note: This is a series of articles in which we document our attempt to build an autonomous drone for the Sparkfun AVC.  The previous post is here.

We owe a proof of concept video to Sparkfun by the end of May.  Since Alex and Matt are leaving town to compete in a regional mathematics competition on Friday morning, that gives us about four days to get a prototype put together and flying.  It's an aggressive schedule, but we like a challenge!

We knew this first day was going to be a rough one.  There's just so much we don't know and all we're starting with is a pile of parts and a lot of enthusiasm.  By the end of the day, we're hoping to see a copter get off the ground under manual control.  So today's agenda was:

  1. Build a hex copter
  2. Get the autopilot module installed and calibrated
  3. Figure out how to get it talking to a transmitter
  4. Learn to fly it

Oh So Many Pieces

My first order of business was to build the air frame.  Step number one is always to inventory the parts and see what we're up against.

Power distribution board, arms, motors, ESCs (electronic speed control - see I'm learning already!), props, and miscellaneous screws and straps.  Check!  Here is a close up of the parts.


That is a lot of parts, but thanks to some great assembly video tutorials, putting it together was pretty easy.  The eagle eyed reader might notice that those ESCs are marked as 30A.  That's A as in amps, meaning that they are capable of providing a continuous current of 30 amps to its motor.  Multiply that by 6 motor/ESC pairs, and you have a system that can draw 180 amps continuous.  If that sounds like a lot of current to you, you're right!  This might be a good time to talk about batteries.

Where do we get a battery that's light enough and small enough for a hex copter but can supply a lot of current?  My solution is a 5000 mAh, 3-cell 25C LiPo battery as shown below with its charger.


A 5000 mAh (milliamp-hour) battery can supply 5000 milliamps, or 5 amps, of current for one hour.  Or it can supply 30 amps for 10 minutes.  Since I expect each motor to draw about 5 amps continuous during flight, I would guess that we'll get about 10 minutes of flight time, which should be enough to accomplish the mission.  If you're wondering, 25C is the battery's capacity rating.  This means that it can safely provide 25 * 5000 mA of current - or roughly 125 amps.  Of course, it could only supply that much current for about 2.5 minutes before draining the battery!

While I was busy assembling the F550 base, Sondra and Matt started trying to figure out how the Pixhawk, the GPS module, the mission planner software, the transmitter, and the receiver all work together.  As with everything, there are a lot of great docs and video tutorials on getting our transmitter to talk to our autopilot.  After trying both versions of the mission planning software, they decided to go with Mission Planner rather than APM planner, at least for now.  Mission Planner is older, but it seems a little more feature complete.

It can take a long time to calibrate accelerometers, compass sensors, GPS receivers, and gyros, but it's not at all optional.  Battling impatience was a theme today.  Below is the assembled F550 with the Pixhawk autopilot temporarily mounted. It's a match made in heaven, we hope.


The next step was to calibrate the sensors on the on the Pixhawk and try to get it talking to the transmitter.  In addition to helping with everything else that was going on, Alex managed to start some OpenCV development on the Jetson board to try to get it talking to the USB camera.


The Jetson TK1 development board is a really incredible piece of technology.  If you haven't heard about it, it's a board that features Nvidia's latest TK1 SoC.  This chip features a 4+1 ARM quad-core configuration in a big.LITTLE arrangement.  That means that it has 4 big, powerful cores for heavy number crunching and 1 smaller, more power-efficient core that handles all of the less time-critical, more mundane work.  In addition, this SoC has a 192-core Kepler GPU so it packs a very serious graphics punch.  We're hoping to try to get OpenCV running in a hardware accelerated mode on this baby in order to give us all the performance we need to find and identify our balloon victims.

In addition, the board runs a version of Ubuntu which means it's really easy to develop right on the board itself.  This makes hardcore Linux development geeks like Alex very happy.

Oh So Many Mistakes

As always it's the things you don't know that you don't know that get you.  Here is a fair sample of our lessons learned for today.
  • Did you know that if you don't bind the transmitter to the receiver, they won't talk to each other?  (that sound you hear is the experienced R/C guys laughing at us... :-)
  • It pays to make sure that the axes on your transmitter match your autopilot's expectation.  It's really tough to fly when an axis is reversed or what you think is the pitch control is actually yaw.
  • Your autopilot will probably want to be mounted on the center axis of your copter.  There is a reason for this (think gyro sensor).
  • Those loud annoying beeping sounds that never quit are your ESCs complaining because they have no signal input from your autopilot.  It will stop once you have things talking properly, I promise.  In the mean time, covering your ears and humming loudly to yourself may help you, but it will also annoy your team mates/family members even more.  Not recommended.
  • If you don't pay close attention and number your motors the way your autopilot expects, your copter will invariably flip over on its back as soon as you try to lift off.  If you don't actually know how to fly a hex copter, you'll probably think "boy, I really suck at this."  And you'll probably be right, but you should also check your motor numbering.
So did we manage to get a copter built and flying after all of that?  Well yes and no, we did manage to achieve level flight for a few seconds, but we definitely have a spinning problem.  Even so, we had a great first day and we made a bunch of progress!  Below is a short video of some of our flight tests.


Hopefully tomorrow we'll achieve some real flight!

Next: Day Two

Tuesday, May 27, 2014

A New Adventure!

We have just completed another long but satisfying FIRST robotics season.  Since only myself and my oldest son participate in FRC, as a family we tend to spend a lot of time apart during the season.  Toward the end of the season, our family started looking for a fun summer project we could do together that would satisfy our inner geeks.  The solution was obvious...

Build an Autonomous Weaponized Drone

And a big welcome to our government friends who have just joined us.  Before I get myself into too much trouble, I'll point out that this drone's meager weaponry won't be dangerous to anyone who is not a large red balloon.  You see, we have decided to enter Sparkfun's Autonomous Vehicle Competition.  We'll be competing in the arial vehicle class, and the tasks our autonomous flying machine will have to complete are: maneuver around obstacles, drop a tennis ball onto a target, and, if possible, find and pop the three large red balloons that will be randomly placed around the course.

This will not only give our family the chance to geek out together over the summer, but having never done any kind of R/C or flying robot project, we will be learning a bunch of new things.  And that is the key, right?  Never stop learning.

The Team and the Parts

The team name we picked is "Bitwise, Byte Foolish" and our drone will be officially named Nibble, although we've nicknamed it Splashy (the competition takes place over water!).  We will all be doing a bit of everything, but there will be some areas of main responsibility among the team (er... family).  I will be handing the hardware and electronics.  My wife Sondra and our younger son Matt will be responsible for programming the autonomous navigation and path planning.  Our older son Alex will be handling the computer vision programming that we plan to use to find and pop the balloons.

We have spent the last couple of weeks discussing and ordering most of the main components that we plan to use.  Now that school is over, we plan to start the project in ernest this week.  Sondra and I have taken the week off from work in order to focus on this project.  I cannot wait!

Here is a preview of some of the parts we've chosen:
  • The flight base will be a DJI F550 hex copter, pictured above.  This air frame is supposed to be sturdy and it fits our budget.
  • We will be using a Pixhawk autopilot (right) and GPS receiver from 3D Robotics.
  • We have selected a Taranis X9D transmitter and X8R receiver from FR Sky just in case we need to take manual control in an emergency.
  • And finally, the heavy lifting (from a computer vision standpoint) will be done by an Nvidia Jetson TK1 board, pictured below.
This is going to be fun.  We will be keeping everyone updated on our quest to actually get this thing airborne this week, so check back here to see how we're doing on this adventure.  I'm hoping that I can even talk Matt and Alex into writing an entry or two describing their parts in the project.  Fingers crossed.

I hope we'll end up with a drone we can be proud of when the AVC competition rolls around on June 21st.  I don't know how competitive we'll be, but if we can send a drone out to run the course and bring it back safely, I'll count that as a win!  Just please don't let it crash into the lake.  Did you hear that Splashy?

Next: Day One

Sunday, March 4, 2012

GroovyFX First Official Release

GroovyFX v0.1 is now available from Maven Central or as a binary Jar file directly from the GroovyFX web site (click the Download link under Community or just click here). This release is compatible with JavaFX v2.0.2.

If you need to use GroovyFX with theJavaFX v2.1 developer preview then you will have to use a snapshot of GroovyFX v0.2.  I'll show an example of that later in this post.

Grabbing Grapes
Having GroovyFX in Maven Central (thanks to Sonatype's OSS hosting!) makes it simple to use GroovyFX in everything from simple test scripts to larger projects.  Consider the simple script below, which uses Groovy's Grab annotation, a part of the Grape system.

This script can be easily run from the command line using
groovy -classpath $JAVAFX_HOME/rt/lib/jfxrt.jar helloGroovyFX.groovy
Pro Tip: Fellow GroovyFX project member Dierk König suggests using the following tip (as discussed on this page) to make your JavaFX libraries available to all of your Groovy scripts:
mkdir ~/.groovy/lib
ln -s $JAVAFX_HOME/rt/lib/* ~/.groovy/lib/ 
Then you can just type:
groovy groovyFXHello.groovy
Project Builds
GroovyFX can become part of a larger Gradle or Maven project by simply including it in your build file's dependencies as shown by this Gradle script.


The build script uses the JAVAFX_HOME environment variable to locate the JavaFX libraries.  It also declares a dependency on GroovyFX 0.1 from the Maven Central repository.

The script also incorporate's Dierk's makeDirs task. Once you've copied this script to the root directory of your new project, you can run gradlew makeDirs to create a standard Maven/Gradle project structure that includes directories like src/main/ and src/test.

Next you can copy the GroovyFX Hello World script shown above into your src/main/groovy directory (minus the @Grab annotation, since we now explicitly declare the dependency on GroovyFX in our Gradle build script). Then run gradlew clean run and you should see your new project compile and run, producing the window shown at the top of this post.

The Maven script is left as an exercise to the masochistic reader.

Using GroovyFX 0.2-SNAPSHOT
You will need to grab a snapshot of the latest GroovyFX 0.2 library if you want to use it with the latest JavaFX 2.1 developer previews. Because we also have a snapshot version of the latest 0.2 changes available from Sonatype's repository, using it is a... um, snap... as shown by the following modifications to the previous Gradle build script.


One thing to be aware of is that the startup syntax in GroovyFX 0.2 has changed a bit.  You no longer need to create an explicit reference to SceneGraphBuilder since one is created for you and passed as the delegate to your start closure.  The script below shows our Hello World example modified to be compatible with GroovyFX 0.2.


That's all there is too it!  Please try out these new releases and let us know if you have any problems or suggestions for improvements.

Tuesday, September 27, 2011

GroovyFX vs ScalaFX

Oh, it's on now.

My good friend and new alternative language nemesis, Stephen Chin, published a blog post last night introducing a project he's been working on called ScalaFX. A nice, easy way to write JavaFX 2.0 code in Scala.

I, of course, have been working with Jim Clarke on his GroovyFX project.  Stephen points out that his ScalaFX library creates code that is more concise and more readable than the Java equivalent.  That is undeniably true, but picking on poor Java because it is succinctness-challenged is too easy.  How about picking on a language that can defend itself with respect to conciseness, programmer productivity, and modern language features?

I give you the GroovyFX version of the Colorful Circles demo:
GroovyFX.start { primaryStage ->
  def circles
  def sg = new SceneGraphBuilder(primaryStage)

  sg.stage(title: 'GroovyFX ColorfulCircles', resizable: false, visible: true) {
    scene(width: 800, height: 600, fill: black) {
      group {
        circles = group {
          30.times {
            circle(radius: 200, fill: rgb(255, 255, 255, 0.05), 
                   stroke: rgb(255, 255, 255, 0.16),
                   strokeWidth: 4, strokeType: 'outside')
          }
          effect boxBlur(width: 10, height: 10, iterations: 3)
        }
      }
      rectangle(width: 800, height: 600, blendMode: 'overlay') {
        def stops = ['#f8bd55', '#c0fe56', '#5dfbc1', '#64c2f8', 
                     '#be4af7', '#ed5fc2', '#ef504c', '#f2660f']
        fill linearGradient(start: [0f, 1f], end: [1f, 0f], stops: stops)
      }
    }

    parallelTransition(cycleCount: indefinite, autoReverse: true) {
      def random = new Random()
      circles.children.each { circle ->
        translateTransition(40.s, node: circle, 
                            fromX: random.nextInt(800), fromY: random.nextInt(600),
                            toX: random.nextInt(800), toY: random.nextInt(600))
      }
    }.play()
  }
}
Update: Stephen updated his version to make it shorter!  He even stole GroovyFX's new gradient stop syntax to do it.  That was low.  :-)  I have no choice but to respond by shortening the GroovyFX version even further.  (Thanks to Jim Clarke for the idea of using the parallelTransition in place of the timeline).

Not only is the GroovyFX version even shorter than the ScalaFX version, it is, in my humble opinion, much more readable.  By my reckoning that's GroovyFX 1, ScalaFX 0.

What will the final score be?  To find out, join Stephen and I for our JavaOne session "JavaFX 2.0 with Alternative Languages" on Wednesday, October 5 at 4:30 PM in the Hotel Nikko.  It should be a great time as Stephen and I battle it out to convince you that our language and library is the best choice for JavaFX development.

Who will be the winner?  Why, developers of course.  No matter which of the two languages you choose, you will have a great JavaFX 2.0 library to go with it!

And here is the psychedelic output of the program, which of course matches Stephen's ScalaFX version and the original Java version.
Happy JavaFX-ing and stay Groovy!

Sunday, August 21, 2011

JavaFX on Griffon: Events and Binding

I have just uploaded a second screencast (embedded below) in the "JavaFX on Griffon" series. If you missed the first screencast, you can find it here. This screencast concludes the basic introduction I wanted to provide to writing JavaFX applications with Griffon.

In my previous article, I was remiss in forgetting to thank Andres Almiray, the leader of the Giffon project, for all his help in creating these plugins. I am thoroughly convinced that Andres spent about twice as much time answering all of my silly questions as it would have taken him to just write the plugins himself.

So Mr. Almiray, thank you for all the time you spent teaching me about Griffon plugins and the Griffon build system. You, sir, are a scholar and a gentleman!

Saturday, August 20, 2011

Writing JavaFX Applications with Griffon

I'm really happy to share one of the side projects I've been working on for a while now. Those of you who follow me on Twitter will have seen images of this in the past, but now I'm finally able to open up the sandbox and let others play.

I have posted a screencast on YouTube that shows how to get started with Griffon, GroovyFX, and JavaFX. I hope you will agree that it is a really fun and easy combination for writing Java desktop clients. If you are ready to try it out for yourself, the archetype I used in the video can be downloaded from my GitHub page. The screencast is embedded below, broken into two parts since it is a little on the lengthy side.

In other GroovyFX news, Jim Clarke and I will be doing an in-depth technical session on GroovyFX at JavaOne. The session will be the last session of the day on Thursday. It's titled "GroovyFX: JavaFX is my bag, baby, yeah!" This session will also touch on using GroovyFX with Griffon so I hope you can squeeze it into your busy JavaOne schedule!

Jim and I have also been busy adding more features to GroovyFX. I hope to post a new article soon describing new features like IDEA code completion and improved event declarations. There is so much Groovy JavaFX stuff to talk about!

Update: The next screencast in this series is now available. This screencast goes into more binding functionality and discusses event handling in JavaFX Griffon applications.

Monday, August 8, 2011

Introducing GroovyFX: It's About Time

It's About Time!
GroovyFX is an open source project whose goal is to combine the conciseness of Groovy with the power of JavaFX 2.0.  Jim Clarke, the originator of the project, and I have been working hard to make GroovyFX the most advanced library for writing JavaFX code with alternative JVM languages.  As you are about to see, it is more than a mere DSL that provides some syntactic sugar for JavaFX code. We have decided that it is past time to share our progress with the wider JavaFX community; this article is long overdue (right, Jonathan?).
This is the first of many articles I'll be writing about GroovyFX.  If you want to stay up to date with the GroovyFX project you can follow this blog or follow me on Twitter.

How to Play

The GroovyFX website has all the information you need to get started but I will summarize it here:
  1. Download and install the latest version of JavaFX and set a JAVAFX_HOME environment variable that points to the root directory of your JavaFX installation.
  2. Download the latest version of Gradle (1.0 milestone-4 or better), unzip it, and add it to your path.  Gradle provides the easiest and quickest way to build and run the demos.
  3. Check out the GroovyFX source from http://svn.codehaus.org/gmod/groovyfx/trunk/.
Now you are ready to build and run the demos.  You can build the project by changing to the GroovyFX root directory and typing
gradle build
Once the project builds successfully, you can start running one of the many demos included with the project by typing a command like
gradle AnalogClockDemo
That will start the application pictured at the top of this article.  You can see a complete list of available demos by typing
gradle tasks
and examining the "Demo" task group.

Setting the Table

Setting up and populating a TableView is something that is not only common but can take a surprising amount of code in Java.  So we will start with the GroovyFX TableViewDemo shown in the image below.
Any of these guys would be happy to answer your JavaFX questions.
The code for this example, in its entirety, is as follows.
@Canonical
class Person {
    @FXBindable String firstName
    @FXBindable String lastName
    @FXBindable String city
    @FXBindable String state
}

def data = [
    new Person('Jim', 'Clarke', 'Orlando', 'FL'),
    new Person('Jim', 'Connors', 'Long Island', 'NY'),
    new Person('Eric', 'Bruno', 'Long Island', 'NY'),
    new Person('Dean', 'Iverson', 'Fort Collins', 'CO'),
    new Person('Jim', 'Weaver', 'Marion', 'IN'),
    new Person('Stephen', 'Chin', 'Belmont', 'CA'),
    new Person('Weiqi', 'Gao', 'Ballwin', 'MO'),
]

GroovyFX.start {
    def sg = new SceneGraphBuilder()

    sg.stage(title: "GroovyFX TableView Demo", visible: true) {
         scene(fill: groovyblue, width: 650, height:450) {
             stackPane(padding: 20) {
                 tableView(items: data) {
                     tableColumn(text: "First Name", property: 'firstName')
                     tableColumn(text: "Last Name", property: 'lastName')
                     tableColumn(text: "City", property: 'city')
                     tableColumn(text: "State", property: 'state')
                 }
             }
         }
    }
}
Compare that with other "simple" JavaFX TableView examples, and it's easy to see that GroovyFX can save you both time and code.  There are three main sections to this code: our Person class, the declaration of the data List, and the scene graph itself.  The Person class contains the four properties that will be displayed in the TableView.  It is annotated with the standard Groovy @Canonical AST transformation that adds a tuple constructor.  This allows us to construct a Person instance using new Person('Jim', 'Clarke', 'Orlando', 'FL') in our data List.  @Canonical also adds appropriate overrides for the hashCode, equals, and toString methods.  These are all generated for us at compile time; this is the power of Groovy's AST transformations.
The @FXBindable annotation is a custom AST transform that Jim and I have added to GroovyFX.  When you use it to annotate a standard Groovy property, the property will be transformed into a JavaFX property. Its job is to generate all of the boilerplate associated with declaring JavaFX properties.  For each annotated property it will generate three methods:
public void setFirstName(String value)
public String getFirstName()
public final StringProperty getFirstNameProperty()
This setup allows you to access your JavaFX properties just as you would any standard Groovy property.
def name = person.firstName
person.firstName = 'James'
person.firstNameProperty.bind( /* some binding expression - more on that below */ )
Considering all of the boilerplate involved when creating JavaFX properties in Java, this will be a real productivity win for GroovyFX users.  One last thing to note is that you can also use @FXBindable to annotate a class.  The following code is equivalent to the class declaration above.  The FXBindable transform will iterate all of the class properties and transform each one into a JavaFX property.
@Canonical
@FXBindable
class Person {
    String firstName
    String lastName
    String city
    String state
}
We'll now turn our attention to the GroovyFX scene graph declaration.  All scene graphs in GroovyFX begin with the GroovyFX.start method, which takes a closure as its argument.  The first few lines of the closure are almost always the same: instantiate a SceneGraphBuilder and use it to declare your stage and scene.  The root of our scene graph is a StackPane layout container.  This is a nice container to use as a root node since it will be resized as the scene size changes and will also grow and shrink its child nodes if they are resizable (like TableView is).  After the stackPane we add a tableView with its data items and its four tableColumn declarations.  It is a very concise way to declare your scene graph.
You have probably noticed that the naming convention for GroovyFX scene graph nodes matches the JavaFX class names with the first letter converted to lower case.  This is a convention we follow for all of our nodes.  Another convention is that you specify properties for a node using Groovy's propertyName: value Map syntax.  There are a couple of other fun things to note about the scene graph code.
There is a new color "groovyblue" that is added to JavaFX's Color class at runtime.  We use it as the background of all of our demos, but you are free to use it in your code as well (it's the color of the star in the Groovy logo).  Any JavaFX color constant can be declared using just its lowercase name such as red, blue, or burlywood.  There are also shortcuts for specifying the padding of a node.  Above we have just used a single integer value which will be used as the padding on all sides.  You can also specify a list with 1, 2, 3, or 4 integers that will be assigned just as they are in CSS.  See the GroovyFX PaddingDemo for the options.  These are just a few of the many short cuts and productivity boosters we've incorporated into GroovyFX.

A Time for Binding

GroovyFX also has a nice surprise for those of you that miss the simple but powerful binding syntax in JavaFX Script.  When JavaFX was ported to Java, the team at Oracle came up with a nice fluent API for specifying binding.  Here is an example of this API:
        hourAngleProperty().bind(Bindings.add(hoursProperty().multiply(30.0),
                                              minutesProperty().multiply(0.5)));
        minuteAngleProperty().bind(minutesProperty().multiply(6.0));
        secondAngleProperty().bind(secondsProperty().multiply(6.0));
Not bad, but all of the method calls do tend to obfuscate the rather simple binding expression. Wouldn't it be great if you could write these kinds of binding expressions in a more natural way? Say, something like this?
        hourAngleProperty.bind((hoursProperty * 30.0) + (minutesProperty * 0.5))
        minuteAngleProperty.bind(minutesProperty * 6.0)
        secondAngleProperty.bind(secondsProperty * 6.0)
This is exactly what Jim has just added to GroovyFX. This functionality uses Groovy's operator overriding ability combined with its ability to add methods to existing classes. The result is all-natural binding goodness with only the essence of the binding and little ceremony. In fact the above expressions are part of the AnalogClockDemo pictured at the start of this article. The code for the demo's Time class is below.
@FXBindable
class Time {
    Integer hours
    Integer minutes
    Integer seconds

    Double hourAngle
    Double minuteAngle
    Double secondAngle

    public Time() {
        // bind the angle properties to the clock time
        hourAngleProperty.bind((hoursProperty * 30.0) + (minutesProperty * 0.5))
        minuteAngleProperty.bind(minutesProperty * 6.0)
        secondAngleProperty.bind(secondsProperty * 6.0)

        // Set the initial clock time
        def calendar = Calendar.instance
        hours = calendar.get(Calendar.HOUR)
        minutes = calendar.get(Calendar.MINUTE)
        seconds = calendar.get(Calendar.SECOND)
    }

    /**
     * Add a second to the time
     */
    public void addOneSecond() {
        seconds = (seconds + 1) % 60
        if (seconds == 0) {
            minutes = (minutes + 1)  % 60
            if (minutes == 0) {
                hours = (hours + 1) % 12
            }
        }
    }
}
Note the use of @FXBindable for easy property declarations, the simple expressive binding, and the natural way of accessing the properties. You use the property name by itself for getting and setting values. You use the property name followed by "Property" to access the underlying JavaFX property class when you need to add listeners or bindings. For completeness, the scene graph code used to draw the clock face is shown below.
time = new Time()

GroovyFX.start {
    def width = 240.0
    def height = 240.0
    def radius = width / 3.0
    def centerX = width / 2.0
    def centerY = height / 2.0

    def sg = new SceneGraphBuilder()

    sg.stage(title: "GroovyFX Clock Demo", width: 245, height: 265, visible: true, resizable: false) {
       def hourDots = []
        for (i in 0..11) {
            def y = -Math.cos(Math.PI / 6.0 * i) * radius
            def x = ((i > 5) ? -1 : 1) * Math.sqrt(radius * radius - y * y)
            def r = i % 3 ? 2.0 : 4.0

            hourDots << circle(fill: black, layoutX: x, layoutY: y, radius: r)
        }

        scene(fill: groovyblue) {
            group(layoutX: centerX, layoutY: centerY) {
                // outer rim
                circle(radius: radius + 20) {
                    fill(radialGradient(radius: 1.0, center: [0.0, 0.0], focusDistance: 0.5, focusAngle: 0,
                                        stops: [[0.9, silver], [1.0, black]]))
                }
                // clock face
                circle(radius: radius + 10, stroke: black) {
                    fill(radialGradient(radius: 1.0, center: [0.0, 0.0], focusDistance: 4.0, focusAngle: 90,
                                        stops: [[0.0, white], [1.0, cadetblue]]))
                }
                // dots around the clock for the hours
                nodes(hourDots)
                // center
                circle(radius: 5, fill: black)
                // hour hand
                path(fill: black) {
                    rotate(angle: bind(time.hourAngleProperty))
                    moveTo(x: 4, y: -4)
                    arcTo(radiusX: -1, radiusY: -1, x: -4, y: -4)
                    lineTo(x: 0, y: -radius / 4 * 3)
                }
                // minute hand
                path(fill: black) {
                    rotate(angle: bind(time.minuteAngleProperty))
                    moveTo(x: 4, y: -4)
                    arcTo(radiusX: -1, radiusY: -1, x: -4, y: -4)
                    lineTo(x: 0, y: -radius)
                }
                // second hand
                line(endY: -radius - 3, strokeWidth: 2, stroke: red) {
                    rotate(angle: bind(time.secondAngleProperty))
                }
            }
        }
    }

    sequentialTransition(cycleCount: "indefinite") {
        pauseTransition(1.s, onFinished: {time.addOneSecond()})
    }.playFromStart()
}
Once again, this is the AnalogClockDemo located in src/demo in the GroovyFX project. These binding expressions should still be considered experimental, but you can see them in action If you run the demo with Gradle.  It should appear as shown here.
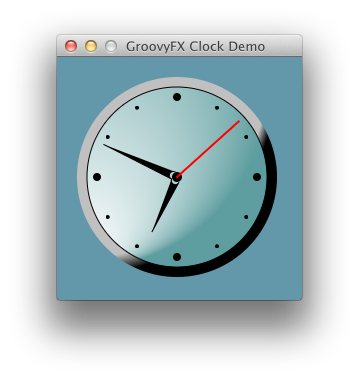
A Groovy Clock
The GroovyFX AnalogClockDemo was inspired by one of the JRuby examples on javafx.com

Conclusion

GroovyFX is a young project and it is advancing rapidly.  We are only just now getting close to releasing our first version, but it already has a lot of very useful functionality.  It has support for virtually every JavaFX shape, control, and chart.  It even provides great integration with the brand new FXML functionality (see the FXMLDemo).
There is quite a lot of documentation and many examples on the project's web site.  We invite you to get involved: download and play with the code then let us know what you think.  You can file JIRA issues for things that don't work or features you would like to see.  Our goal with GroovyFX is to make it fun and easy to write client Java applications.  So join in!

Thursday, February 24, 2011

Xoom, Xoom, Xoom

Android really shines on a tablet. After playing with my new Xoom tablet and Android Honeycomb for a few hours now, I get the sense that Android was really meant for the larger screen. The notifications, the multitasking, the widgets; they all combine to make an incredibly powerful and rich tablet OS. Having a home screen with your calendar and email at your finger tips is incredibly more useful than page after page of icon matrixes.

X1

And switching between applications is much nicer on Honeycomb.

X3

To think that all this time Android has really been a tablet OS crammed into a smart phone just bursting to get free. By the same token, I can see now just how lame iOS is as a nice, but limited phone OS when running scaled up to a larger screen on the iPad.

And the Xoom hardware is very impressive. It is slightly taller but significantly narrower than the iPad and has much smaller bevels around the screen as well. Although this does make it harder to carry the Xoom without leaving finger tip smudges. The dual core Tegra2 processor makes everything feel pretty snappy as well.

The Xoom has a higher resolution packed into a slightly smaller screen which makes for higher DPI. Games like Angry Birds and eBooks look incredible on the Xoom's higher density screen.

X2

X4

Notice how the status bar at the bottom of the screen goes into a minimal mode when reading a book? The same thing happens when viewing a movie in order to minimize the distraction of that bottom strip. These are really nice touches that I would usually expect from Apple rather than Google.

Of course, I'm talking here in terms of environment only. With a few exceptions, as far as applications go, iPad wins hands down. No question. No contest.

As we have seen in the past, a superior OS usually doesn't win against an OS with more apps so this should be an interesting fight.

Saturday, February 12, 2011

A Sweet Combination: JavaFX 2.0 EA, Griffon, and Groovy

Working with the recent early access release of JavaFX 2.0 has been interesting. On one hand, the scene graph API you know and love translates surprisingly well to Java. The team at Oracle has done a nice job of keeping the new API simple to use. The animation support still makes it easy to do the simple things, and possible to do the sophisticated. The memory overhead is down while performance is up. All good.

Screen shot 2011 02 12 at 6 30 30 PM

There are definitely places where JavaFX Script (now Visage) is missed. Binding, object literals, functional programming, and easy internationalization were all particularly useful language features. To make up for this loss, you can now use all of the old, familiar Java tools to write JavaFX including all of the awesome testing libraries and IDEs that Java is known for. In my opinion, this more than makes up for the loss of the awesomeness that was the JavaFX Script syntactic sugar.

You can always add some of that sweetness back in by using one of the many great JVM languages at our disposal. My weapon of choice happens to be Groovy and I can tell you that Groovy and JavaFX are a potent combination. Apparently Groovy is a terrific language for expressing application frameworks as it boasts two of the best in the Java world: Grails for web applications and Griffon for desktop applications.

Yesterday I decided to take a quick look at what would be involved in creating a JavaFX application plugin for Griffon. I was pleasantly surprised at how easy it was. Griffon's architecture is clean and the documentation was great. It took me a lot longer than it should have just because I was enjoying looking around under Griffon's hood.

A video showing the results of my little experiment is embedded below.

I plan to continue developing this plugin with the ultimate goal being first-class Griffon support for JavaFX applications when JavaFX 2.0 ships later this fall.

The JavaFX team at Oracle has a lot of work ahead of them. There are some missing features and some rough edges, but this Early Access release is a great start. I can't wait to see the finished product.

Saturday, July 17, 2010

My Bads

Just a quick update (long overdue - sorry!) to correct a couple of errors in my last two posts.

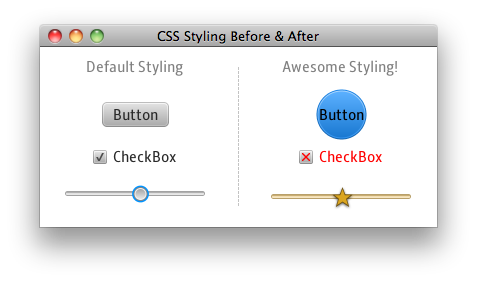
First, going all the way back to my post So What's It All Good For?, I realized while using my 'X' shape on another control that I had flubbed one of the coordinates in the SVG path.  This made the 'X' look a little hinkey.  Although it was really only noticeable at larger sizes, I went back and fixed the SVG path in that post.  Now the 'X' checkbox looks better.

simpleskinning.png

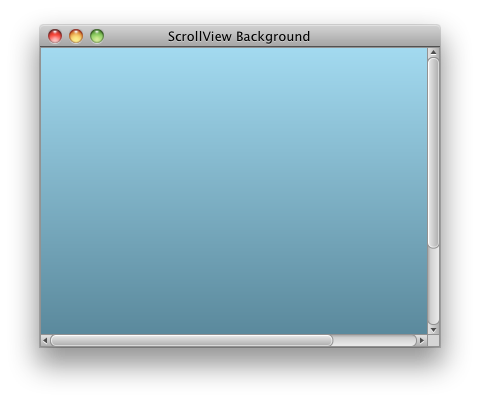
My second mistake was of a larger variety.  I incorrectly claimed in my Into the Background post that you couldn't use a gradient as the background of a ScrollView because once you added other Nodes, the CSS engine would throw an exception.  Turns out it was user error.

You see, I was assigning the gradient to the -fx-background property in the .scene style.  The fact is that this property must evaluate to a color, not a gradient, because it is used later in the default Caspian style sheet as the base color from which other gradients are calculated.  For some reason the CSS engine objected to me trying to force it to using a gradient as a color stop in another gradient.  Go figure!

This is the reason that the error would only manifest once another control was added to the scene as that was when the gradient-based-on-gradient calculation would be triggered.

My mistake was kindly pointed out by David Grieve in response to my initial bug report here.  I have also updated the original article to demonstrate a variation of the technique that David suggested.  Thanks David!

ScrollViewGrad.png

Hopefully these kinds of mistakes will be less likely to happen in the future now that some nice documentation of the JavaFX CSS engine exists.  There is also a new JIRA case opened to add better error handling and reporting to the CSS engine, which should also be a big help.

p.s. If you haven't signed the petition to open source the JavaFX runtime, please do so now!  Having access to the source code could also help avoid these kinds of "misunderstandings" in the future.