Wednesday, May 28, 2014

Day One. Objective: Achieve Manual Flight

Note: This is a series of articles in which we document our attempt to build an autonomous drone for the Sparkfun AVC.  The previous post is here.

We owe a proof of concept video to Sparkfun by the end of May.  Since Alex and Matt are leaving town to compete in a regional mathematics competition on Friday morning, that gives us about four days to get a prototype put together and flying.  It's an aggressive schedule, but we like a challenge!

We knew this first day was going to be a rough one.  There's just so much we don't know and all we're starting with is a pile of parts and a lot of enthusiasm.  By the end of the day, we're hoping to see a copter get off the ground under manual control.  So today's agenda was:

  1. Build a hex copter
  2. Get the autopilot module installed and calibrated
  3. Figure out how to get it talking to a transmitter
  4. Learn to fly it

Oh So Many Pieces

My first order of business was to build the air frame.  Step number one is always to inventory the parts and see what we're up against.

Power distribution board, arms, motors, ESCs (electronic speed control - see I'm learning already!), props, and miscellaneous screws and straps.  Check!  Here is a close up of the parts.


That is a lot of parts, but thanks to some great assembly video tutorials, putting it together was pretty easy.  The eagle eyed reader might notice that those ESCs are marked as 30A.  That's A as in amps, meaning that they are capable of providing a continuous current of 30 amps to its motor.  Multiply that by 6 motor/ESC pairs, and you have a system that can draw 180 amps continuous.  If that sounds like a lot of current to you, you're right!  This might be a good time to talk about batteries.

Where do we get a battery that's light enough and small enough for a hex copter but can supply a lot of current?  My solution is a 5000 mAh, 3-cell 25C LiPo battery as shown below with its charger.


A 5000 mAh (milliamp-hour) battery can supply 5000 milliamps, or 5 amps, of current for one hour.  Or it can supply 30 amps for 10 minutes.  Since I expect each motor to draw about 5 amps continuous during flight, I would guess that we'll get about 10 minutes of flight time, which should be enough to accomplish the mission.  If you're wondering, 25C is the battery's capacity rating.  This means that it can safely provide 25 * 5000 mA of current - or roughly 125 amps.  Of course, it could only supply that much current for about 2.5 minutes before draining the battery!

While I was busy assembling the F550 base, Sondra and Matt started trying to figure out how the Pixhawk, the GPS module, the mission planner software, the transmitter, and the receiver all work together.  As with everything, there are a lot of great docs and video tutorials on getting our transmitter to talk to our autopilot.  After trying both versions of the mission planning software, they decided to go with Mission Planner rather than APM planner, at least for now.  Mission Planner is older, but it seems a little more feature complete.

It can take a long time to calibrate accelerometers, compass sensors, GPS receivers, and gyros, but it's not at all optional.  Battling impatience was a theme today.  Below is the assembled F550 with the Pixhawk autopilot temporarily mounted. It's a match made in heaven, we hope.


The next step was to calibrate the sensors on the on the Pixhawk and try to get it talking to the transmitter.  In addition to helping with everything else that was going on, Alex managed to start some OpenCV development on the Jetson board to try to get it talking to the USB camera.


The Jetson TK1 development board is a really incredible piece of technology.  If you haven't heard about it, it's a board that features Nvidia's latest TK1 SoC.  This chip features a 4+1 ARM quad-core configuration in a big.LITTLE arrangement.  That means that it has 4 big, powerful cores for heavy number crunching and 1 smaller, more power-efficient core that handles all of the less time-critical, more mundane work.  In addition, this SoC has a 192-core Kepler GPU so it packs a very serious graphics punch.  We're hoping to try to get OpenCV running in a hardware accelerated mode on this baby in order to give us all the performance we need to find and identify our balloon victims.

In addition, the board runs a version of Ubuntu which means it's really easy to develop right on the board itself.  This makes hardcore Linux development geeks like Alex very happy.

Oh So Many Mistakes

As always it's the things you don't know that you don't know that get you.  Here is a fair sample of our lessons learned for today.
  • Did you know that if you don't bind the transmitter to the receiver, they won't talk to each other?  (that sound you hear is the experienced R/C guys laughing at us... :-)
  • It pays to make sure that the axes on your transmitter match your autopilot's expectation.  It's really tough to fly when an axis is reversed or what you think is the pitch control is actually yaw.
  • Your autopilot will probably want to be mounted on the center axis of your copter.  There is a reason for this (think gyro sensor).
  • Those loud annoying beeping sounds that never quit are your ESCs complaining because they have no signal input from your autopilot.  It will stop once you have things talking properly, I promise.  In the mean time, covering your ears and humming loudly to yourself may help you, but it will also annoy your team mates/family members even more.  Not recommended.
  • If you don't pay close attention and number your motors the way your autopilot expects, your copter will invariably flip over on its back as soon as you try to lift off.  If you don't actually know how to fly a hex copter, you'll probably think "boy, I really suck at this."  And you'll probably be right, but you should also check your motor numbering.
So did we manage to get a copter built and flying after all of that?  Well yes and no, we did manage to achieve level flight for a few seconds, but we definitely have a spinning problem.  Even so, we had a great first day and we made a bunch of progress!  Below is a short video of some of our flight tests.


Hopefully tomorrow we'll achieve some real flight!

Next: Day Two

Tuesday, May 27, 2014

A New Adventure!

We have just completed another long but satisfying FIRST robotics season.  Since only myself and my oldest son participate in FRC, as a family we tend to spend a lot of time apart during the season.  Toward the end of the season, our family started looking for a fun summer project we could do together that would satisfy our inner geeks.  The solution was obvious...

Build an Autonomous Weaponized Drone

And a big welcome to our government friends who have just joined us.  Before I get myself into too much trouble, I'll point out that this drone's meager weaponry won't be dangerous to anyone who is not a large red balloon.  You see, we have decided to enter Sparkfun's Autonomous Vehicle Competition.  We'll be competing in the arial vehicle class, and the tasks our autonomous flying machine will have to complete are: maneuver around obstacles, drop a tennis ball onto a target, and, if possible, find and pop the three large red balloons that will be randomly placed around the course.

This will not only give our family the chance to geek out together over the summer, but having never done any kind of R/C or flying robot project, we will be learning a bunch of new things.  And that is the key, right?  Never stop learning.

The Team and the Parts

The team name we picked is "Bitwise, Byte Foolish" and our drone will be officially named Nibble, although we've nicknamed it Splashy (the competition takes place over water!).  We will all be doing a bit of everything, but there will be some areas of main responsibility among the team (er... family).  I will be handing the hardware and electronics.  My wife Sondra and our younger son Matt will be responsible for programming the autonomous navigation and path planning.  Our older son Alex will be handling the computer vision programming that we plan to use to find and pop the balloons.

We have spent the last couple of weeks discussing and ordering most of the main components that we plan to use.  Now that school is over, we plan to start the project in ernest this week.  Sondra and I have taken the week off from work in order to focus on this project.  I cannot wait!

Here is a preview of some of the parts we've chosen:
  • The flight base will be a DJI F550 hex copter, pictured above.  This air frame is supposed to be sturdy and it fits our budget.
  • We will be using a Pixhawk autopilot (right) and GPS receiver from 3D Robotics.
  • We have selected a Taranis X9D transmitter and X8R receiver from FR Sky just in case we need to take manual control in an emergency.
  • And finally, the heavy lifting (from a computer vision standpoint) will be done by an Nvidia Jetson TK1 board, pictured below.
This is going to be fun.  We will be keeping everyone updated on our quest to actually get this thing airborne this week, so check back here to see how we're doing on this adventure.  I'm hoping that I can even talk Matt and Alex into writing an entry or two describing their parts in the project.  Fingers crossed.

I hope we'll end up with a drone we can be proud of when the AVC competition rolls around on June 21st.  I don't know how competitive we'll be, but if we can send a drone out to run the course and bring it back safely, I'll count that as a win!  Just please don't let it crash into the lake.  Did you hear that Splashy?

Next: Day One

Sunday, March 4, 2012

GroovyFX First Official Release

GroovyFX v0.1 is now available from Maven Central or as a binary Jar file directly from the GroovyFX web site (click the Download link under Community or just click here). This release is compatible with JavaFX v2.0.2.

If you need to use GroovyFX with theJavaFX v2.1 developer preview then you will have to use a snapshot of GroovyFX v0.2.  I'll show an example of that later in this post.

Grabbing Grapes
Having GroovyFX in Maven Central (thanks to Sonatype's OSS hosting!) makes it simple to use GroovyFX in everything from simple test scripts to larger projects.  Consider the simple script below, which uses Groovy's Grab annotation, a part of the Grape system.

This script can be easily run from the command line using
groovy -classpath $JAVAFX_HOME/rt/lib/jfxrt.jar helloGroovyFX.groovy
Pro Tip: Fellow GroovyFX project member Dierk König suggests using the following tip (as discussed on this page) to make your JavaFX libraries available to all of your Groovy scripts:
mkdir ~/.groovy/lib
ln -s $JAVAFX_HOME/rt/lib/* ~/.groovy/lib/ 
Then you can just type:
groovy groovyFXHello.groovy
Project Builds
GroovyFX can become part of a larger Gradle or Maven project by simply including it in your build file's dependencies as shown by this Gradle script.


The build script uses the JAVAFX_HOME environment variable to locate the JavaFX libraries.  It also declares a dependency on GroovyFX 0.1 from the Maven Central repository.

The script also incorporate's Dierk's makeDirs task. Once you've copied this script to the root directory of your new project, you can run gradlew makeDirs to create a standard Maven/Gradle project structure that includes directories like src/main/ and src/test.

Next you can copy the GroovyFX Hello World script shown above into your src/main/groovy directory (minus the @Grab annotation, since we now explicitly declare the dependency on GroovyFX in our Gradle build script). Then run gradlew clean run and you should see your new project compile and run, producing the window shown at the top of this post.

The Maven script is left as an exercise to the masochistic reader.

Using GroovyFX 0.2-SNAPSHOT
You will need to grab a snapshot of the latest GroovyFX 0.2 library if you want to use it with the latest JavaFX 2.1 developer previews. Because we also have a snapshot version of the latest 0.2 changes available from Sonatype's repository, using it is a... um, snap... as shown by the following modifications to the previous Gradle build script.


One thing to be aware of is that the startup syntax in GroovyFX 0.2 has changed a bit.  You no longer need to create an explicit reference to SceneGraphBuilder since one is created for you and passed as the delegate to your start closure.  The script below shows our Hello World example modified to be compatible with GroovyFX 0.2.


That's all there is too it!  Please try out these new releases and let us know if you have any problems or suggestions for improvements.

Tuesday, September 27, 2011

GroovyFX vs ScalaFX

Oh, it's on now.

My good friend and new alternative language nemesis, Stephen Chin, published a blog post last night introducing a project he's been working on called ScalaFX. A nice, easy way to write JavaFX 2.0 code in Scala.

I, of course, have been working with Jim Clarke on his GroovyFX project.  Stephen points out that his ScalaFX library creates code that is more concise and more readable than the Java equivalent.  That is undeniably true, but picking on poor Java because it is succinctness-challenged is too easy.  How about picking on a language that can defend itself with respect to conciseness, programmer productivity, and modern language features?

I give you the GroovyFX version of the Colorful Circles demo:
GroovyFX.start { primaryStage ->
  def circles
  def sg = new SceneGraphBuilder(primaryStage)

  sg.stage(title: 'GroovyFX ColorfulCircles', resizable: false, visible: true) {
    scene(width: 800, height: 600, fill: black) {
      group {
        circles = group {
          30.times {
            circle(radius: 200, fill: rgb(255, 255, 255, 0.05), 
                   stroke: rgb(255, 255, 255, 0.16),
                   strokeWidth: 4, strokeType: 'outside')
          }
          effect boxBlur(width: 10, height: 10, iterations: 3)
        }
      }
      rectangle(width: 800, height: 600, blendMode: 'overlay') {
        def stops = ['#f8bd55', '#c0fe56', '#5dfbc1', '#64c2f8', 
                     '#be4af7', '#ed5fc2', '#ef504c', '#f2660f']
        fill linearGradient(start: [0f, 1f], end: [1f, 0f], stops: stops)
      }
    }

    parallelTransition(cycleCount: indefinite, autoReverse: true) {
      def random = new Random()
      circles.children.each { circle ->
        translateTransition(40.s, node: circle, 
                            fromX: random.nextInt(800), fromY: random.nextInt(600),
                            toX: random.nextInt(800), toY: random.nextInt(600))
      }
    }.play()
  }
}
Update: Stephen updated his version to make it shorter!  He even stole GroovyFX's new gradient stop syntax to do it.  That was low.  :-)  I have no choice but to respond by shortening the GroovyFX version even further.  (Thanks to Jim Clarke for the idea of using the parallelTransition in place of the timeline).

Not only is the GroovyFX version even shorter than the ScalaFX version, it is, in my humble opinion, much more readable.  By my reckoning that's GroovyFX 1, ScalaFX 0.

What will the final score be?  To find out, join Stephen and I for our JavaOne session "JavaFX 2.0 with Alternative Languages" on Wednesday, October 5 at 4:30 PM in the Hotel Nikko.  It should be a great time as Stephen and I battle it out to convince you that our language and library is the best choice for JavaFX development.

Who will be the winner?  Why, developers of course.  No matter which of the two languages you choose, you will have a great JavaFX 2.0 library to go with it!

And here is the psychedelic output of the program, which of course matches Stephen's ScalaFX version and the original Java version.
Happy JavaFX-ing and stay Groovy!

Sunday, August 21, 2011

JavaFX on Griffon: Events and Binding

I have just uploaded a second screencast (embedded below) in the "JavaFX on Griffon" series. If you missed the first screencast, you can find it here. This screencast concludes the basic introduction I wanted to provide to writing JavaFX applications with Griffon.

In my previous article, I was remiss in forgetting to thank Andres Almiray, the leader of the Giffon project, for all his help in creating these plugins. I am thoroughly convinced that Andres spent about twice as much time answering all of my silly questions as it would have taken him to just write the plugins himself.

So Mr. Almiray, thank you for all the time you spent teaching me about Griffon plugins and the Griffon build system. You, sir, are a scholar and a gentleman!

Saturday, August 20, 2011

Writing JavaFX Applications with Griffon

I'm really happy to share one of the side projects I've been working on for a while now. Those of you who follow me on Twitter will have seen images of this in the past, but now I'm finally able to open up the sandbox and let others play.

I have posted a screencast on YouTube that shows how to get started with Griffon, GroovyFX, and JavaFX. I hope you will agree that it is a really fun and easy combination for writing Java desktop clients. If you are ready to try it out for yourself, the archetype I used in the video can be downloaded from my GitHub page. The screencast is embedded below, broken into two parts since it is a little on the lengthy side.

In other GroovyFX news, Jim Clarke and I will be doing an in-depth technical session on GroovyFX at JavaOne. The session will be the last session of the day on Thursday. It's titled "GroovyFX: JavaFX is my bag, baby, yeah!" This session will also touch on using GroovyFX with Griffon so I hope you can squeeze it into your busy JavaOne schedule!

Jim and I have also been busy adding more features to GroovyFX. I hope to post a new article soon describing new features like IDEA code completion and improved event declarations. There is so much Groovy JavaFX stuff to talk about!

Update: The next screencast in this series is now available. This screencast goes into more binding functionality and discusses event handling in JavaFX Griffon applications.

Monday, August 8, 2011

Introducing GroovyFX: It's About Time

It's About Time!
GroovyFX is an open source project whose goal is to combine the conciseness of Groovy with the power of JavaFX 2.0.  Jim Clarke, the originator of the project, and I have been working hard to make GroovyFX the most advanced library for writing JavaFX code with alternative JVM languages.  As you are about to see, it is more than a mere DSL that provides some syntactic sugar for JavaFX code. We have decided that it is past time to share our progress with the wider JavaFX community; this article is long overdue (right, Jonathan?).
This is the first of many articles I'll be writing about GroovyFX.  If you want to stay up to date with the GroovyFX project you can follow this blog or follow me on Twitter.

How to Play

The GroovyFX website has all the information you need to get started but I will summarize it here:
  1. Download and install the latest version of JavaFX and set a JAVAFX_HOME environment variable that points to the root directory of your JavaFX installation.
  2. Download the latest version of Gradle (1.0 milestone-4 or better), unzip it, and add it to your path.  Gradle provides the easiest and quickest way to build and run the demos.
  3. Check out the GroovyFX source from http://svn.codehaus.org/gmod/groovyfx/trunk/.
Now you are ready to build and run the demos.  You can build the project by changing to the GroovyFX root directory and typing
gradle build
Once the project builds successfully, you can start running one of the many demos included with the project by typing a command like
gradle AnalogClockDemo
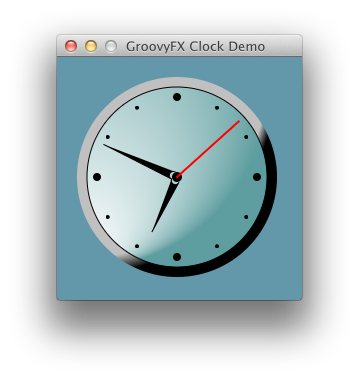
That will start the application pictured at the top of this article.  You can see a complete list of available demos by typing
gradle tasks
and examining the "Demo" task group.

Setting the Table

Setting up and populating a TableView is something that is not only common but can take a surprising amount of code in Java.  So we will start with the GroovyFX TableViewDemo shown in the image below.
Any of these guys would be happy to answer your JavaFX questions.
The code for this example, in its entirety, is as follows.
@Canonical
class Person {
    @FXBindable String firstName
    @FXBindable String lastName
    @FXBindable String city
    @FXBindable String state
}

def data = [
    new Person('Jim', 'Clarke', 'Orlando', 'FL'),
    new Person('Jim', 'Connors', 'Long Island', 'NY'),
    new Person('Eric', 'Bruno', 'Long Island', 'NY'),
    new Person('Dean', 'Iverson', 'Fort Collins', 'CO'),
    new Person('Jim', 'Weaver', 'Marion', 'IN'),
    new Person('Stephen', 'Chin', 'Belmont', 'CA'),
    new Person('Weiqi', 'Gao', 'Ballwin', 'MO'),
]

GroovyFX.start {
    def sg = new SceneGraphBuilder()

    sg.stage(title: "GroovyFX TableView Demo", visible: true) {
         scene(fill: groovyblue, width: 650, height:450) {
             stackPane(padding: 20) {
                 tableView(items: data) {
                     tableColumn(text: "First Name", property: 'firstName')
                     tableColumn(text: "Last Name", property: 'lastName')
                     tableColumn(text: "City", property: 'city')
                     tableColumn(text: "State", property: 'state')
                 }
             }
         }
    }
}
Compare that with other "simple" JavaFX TableView examples, and it's easy to see that GroovyFX can save you both time and code.  There are three main sections to this code: our Person class, the declaration of the data List, and the scene graph itself.  The Person class contains the four properties that will be displayed in the TableView.  It is annotated with the standard Groovy @Canonical AST transformation that adds a tuple constructor.  This allows us to construct a Person instance using new Person('Jim', 'Clarke', 'Orlando', 'FL') in our data List.  @Canonical also adds appropriate overrides for the hashCode, equals, and toString methods.  These are all generated for us at compile time; this is the power of Groovy's AST transformations.
The @FXBindable annotation is a custom AST transform that Jim and I have added to GroovyFX.  When you use it to annotate a standard Groovy property, the property will be transformed into a JavaFX property. Its job is to generate all of the boilerplate associated with declaring JavaFX properties.  For each annotated property it will generate three methods:
public void setFirstName(String value)
public String getFirstName()
public final StringProperty getFirstNameProperty()
This setup allows you to access your JavaFX properties just as you would any standard Groovy property.
def name = person.firstName
person.firstName = 'James'
person.firstNameProperty.bind( /* some binding expression - more on that below */ )
Considering all of the boilerplate involved when creating JavaFX properties in Java, this will be a real productivity win for GroovyFX users.  One last thing to note is that you can also use @FXBindable to annotate a class.  The following code is equivalent to the class declaration above.  The FXBindable transform will iterate all of the class properties and transform each one into a JavaFX property.
@Canonical
@FXBindable
class Person {
    String firstName
    String lastName
    String city
    String state
}
We'll now turn our attention to the GroovyFX scene graph declaration.  All scene graphs in GroovyFX begin with the GroovyFX.start method, which takes a closure as its argument.  The first few lines of the closure are almost always the same: instantiate a SceneGraphBuilder and use it to declare your stage and scene.  The root of our scene graph is a StackPane layout container.  This is a nice container to use as a root node since it will be resized as the scene size changes and will also grow and shrink its child nodes if they are resizable (like TableView is).  After the stackPane we add a tableView with its data items and its four tableColumn declarations.  It is a very concise way to declare your scene graph.
You have probably noticed that the naming convention for GroovyFX scene graph nodes matches the JavaFX class names with the first letter converted to lower case.  This is a convention we follow for all of our nodes.  Another convention is that you specify properties for a node using Groovy's propertyName: value Map syntax.  There are a couple of other fun things to note about the scene graph code.
There is a new color "groovyblue" that is added to JavaFX's Color class at runtime.  We use it as the background of all of our demos, but you are free to use it in your code as well (it's the color of the star in the Groovy logo).  Any JavaFX color constant can be declared using just its lowercase name such as red, blue, or burlywood.  There are also shortcuts for specifying the padding of a node.  Above we have just used a single integer value which will be used as the padding on all sides.  You can also specify a list with 1, 2, 3, or 4 integers that will be assigned just as they are in CSS.  See the GroovyFX PaddingDemo for the options.  These are just a few of the many short cuts and productivity boosters we've incorporated into GroovyFX.

A Time for Binding

GroovyFX also has a nice surprise for those of you that miss the simple but powerful binding syntax in JavaFX Script.  When JavaFX was ported to Java, the team at Oracle came up with a nice fluent API for specifying binding.  Here is an example of this API:
        hourAngleProperty().bind(Bindings.add(hoursProperty().multiply(30.0),
                                              minutesProperty().multiply(0.5)));
        minuteAngleProperty().bind(minutesProperty().multiply(6.0));
        secondAngleProperty().bind(secondsProperty().multiply(6.0));
Not bad, but all of the method calls do tend to obfuscate the rather simple binding expression. Wouldn't it be great if you could write these kinds of binding expressions in a more natural way? Say, something like this?
        hourAngleProperty.bind((hoursProperty * 30.0) + (minutesProperty * 0.5))
        minuteAngleProperty.bind(minutesProperty * 6.0)
        secondAngleProperty.bind(secondsProperty * 6.0)
This is exactly what Jim has just added to GroovyFX. This functionality uses Groovy's operator overriding ability combined with its ability to add methods to existing classes. The result is all-natural binding goodness with only the essence of the binding and little ceremony. In fact the above expressions are part of the AnalogClockDemo pictured at the start of this article. The code for the demo's Time class is below.
@FXBindable
class Time {
    Integer hours
    Integer minutes
    Integer seconds

    Double hourAngle
    Double minuteAngle
    Double secondAngle

    public Time() {
        // bind the angle properties to the clock time
        hourAngleProperty.bind((hoursProperty * 30.0) + (minutesProperty * 0.5))
        minuteAngleProperty.bind(minutesProperty * 6.0)
        secondAngleProperty.bind(secondsProperty * 6.0)

        // Set the initial clock time
        def calendar = Calendar.instance
        hours = calendar.get(Calendar.HOUR)
        minutes = calendar.get(Calendar.MINUTE)
        seconds = calendar.get(Calendar.SECOND)
    }

    /**
     * Add a second to the time
     */
    public void addOneSecond() {
        seconds = (seconds + 1) % 60
        if (seconds == 0) {
            minutes = (minutes + 1)  % 60
            if (minutes == 0) {
                hours = (hours + 1) % 12
            }
        }
    }
}
Note the use of @FXBindable for easy property declarations, the simple expressive binding, and the natural way of accessing the properties. You use the property name by itself for getting and setting values. You use the property name followed by "Property" to access the underlying JavaFX property class when you need to add listeners or bindings. For completeness, the scene graph code used to draw the clock face is shown below.
time = new Time()

GroovyFX.start {
    def width = 240.0
    def height = 240.0
    def radius = width / 3.0
    def centerX = width / 2.0
    def centerY = height / 2.0

    def sg = new SceneGraphBuilder()

    sg.stage(title: "GroovyFX Clock Demo", width: 245, height: 265, visible: true, resizable: false) {
       def hourDots = []
        for (i in 0..11) {
            def y = -Math.cos(Math.PI / 6.0 * i) * radius
            def x = ((i > 5) ? -1 : 1) * Math.sqrt(radius * radius - y * y)
            def r = i % 3 ? 2.0 : 4.0

            hourDots << circle(fill: black, layoutX: x, layoutY: y, radius: r)
        }

        scene(fill: groovyblue) {
            group(layoutX: centerX, layoutY: centerY) {
                // outer rim
                circle(radius: radius + 20) {
                    fill(radialGradient(radius: 1.0, center: [0.0, 0.0], focusDistance: 0.5, focusAngle: 0,
                                        stops: [[0.9, silver], [1.0, black]]))
                }
                // clock face
                circle(radius: radius + 10, stroke: black) {
                    fill(radialGradient(radius: 1.0, center: [0.0, 0.0], focusDistance: 4.0, focusAngle: 90,
                                        stops: [[0.0, white], [1.0, cadetblue]]))
                }
                // dots around the clock for the hours
                nodes(hourDots)
                // center
                circle(radius: 5, fill: black)
                // hour hand
                path(fill: black) {
                    rotate(angle: bind(time.hourAngleProperty))
                    moveTo(x: 4, y: -4)
                    arcTo(radiusX: -1, radiusY: -1, x: -4, y: -4)
                    lineTo(x: 0, y: -radius / 4 * 3)
                }
                // minute hand
                path(fill: black) {
                    rotate(angle: bind(time.minuteAngleProperty))
                    moveTo(x: 4, y: -4)
                    arcTo(radiusX: -1, radiusY: -1, x: -4, y: -4)
                    lineTo(x: 0, y: -radius)
                }
                // second hand
                line(endY: -radius - 3, strokeWidth: 2, stroke: red) {
                    rotate(angle: bind(time.secondAngleProperty))
                }
            }
        }
    }

    sequentialTransition(cycleCount: "indefinite") {
        pauseTransition(1.s, onFinished: {time.addOneSecond()})
    }.playFromStart()
}
Once again, this is the AnalogClockDemo located in src/demo in the GroovyFX project. These binding expressions should still be considered experimental, but you can see them in action If you run the demo with Gradle.  It should appear as shown here.
A Groovy Clock
The GroovyFX AnalogClockDemo was inspired by one of the JRuby examples on javafx.com

Conclusion

GroovyFX is a young project and it is advancing rapidly.  We are only just now getting close to releasing our first version, but it already has a lot of very useful functionality.  It has support for virtually every JavaFX shape, control, and chart.  It even provides great integration with the brand new FXML functionality (see the FXMLDemo).
There is quite a lot of documentation and many examples on the project's web site.  We invite you to get involved: download and play with the code then let us know what you think.  You can file JIRA issues for things that don't work or features you would like to see.  Our goal with GroovyFX is to make it fun and easy to write client Java applications.  So join in!